Table of Contents
Ever felt like your character looks like every other person in the game? You’re not alone. Over 70% of users want more ways to stand out—but most never try to design anything themselves. That ends now.
Key Points:
- You can design outfits without advanced tools.
- Templates make everything easier.
- A simple PNG can change your whole look.
- Studio has options most users ignore.
- You don’t need Robux to experiment offline.
Start by grabbing the right shirt template
Before anything, you need the correct format. The secret sauce? A simple PNG file with a specific layout. The easiest way to do that is to use the Roblox shirt template on Alive Studio. It’s already preloaded there, so you won’t need to mess with extra downloads or wonder if you got the sizing wrong. You just focus on your design, colors, and how cool your character is about to look.
Don’t overthink the file. It’s a blank canvas. It tells the system where the sleeves go, where the torso sits, and how it all wraps around the body. You’ll use it as your base, so every pixel counts.
Pro tip: Keep a copy saved as a backup. If you mess up, you won’t have to start from zero.
Set up your editing space before jumping into design
Before you dive into design, your workspace matters. Think of it like prepping your desk before sketching something new. A messy desk, messy brain. Clean space, clean design.
You don’t need a $2,000 PC or a massive program to make magic. What you do need is a clean setup and the right mindset. Use a browser-based tool like Photopea or download GIMP. Both are free. Both do the job. Have your PNG template ready and maybe sketch your idea on paper first. Keep snacks nearby, stay hydrated.
Layers will help you stay organized. Name each one. Torso, left sleeve, right sleeve. You’ll thank yourself later when you’re swapping designs like a pro.
Focus on torso and sleeves separately
This part always trips people up. Each part connects like a 3D puzzle. One small mistake and the outfit falls apart visually.
Start with the torso. It’s your main stage. Center your designs here—logos, colors, graphics. Then move to the sleeves. Make sure both arms mirror each other unless you want an asymmetric design.
Zoom in when editing. Use straight lines to box off areas. If things aren’t clear, draw guidelines. Some areas wrap around edges, so anything misaligned will show up instantly in-game. Preview often.
Avoid thin lines and tiny fonts. The engine will stretch and blur them. Bold is better.
Preview before you upload anything
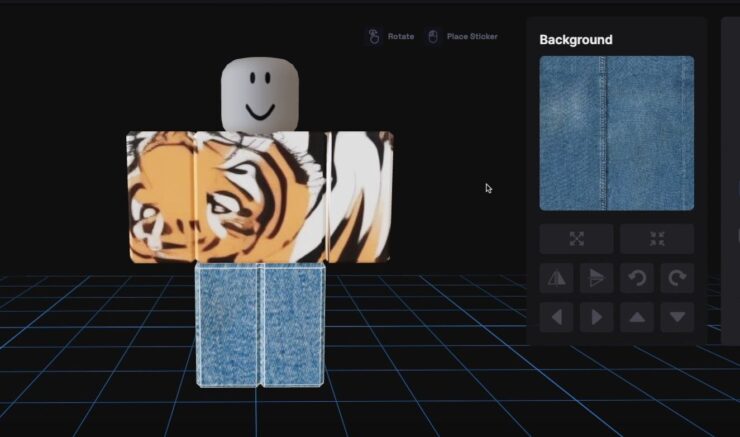
You’ve finished your layout and saved the PNG. Now comes the part most skip—but shouldn’t. Testing in Roblox Studio. Because what looks good on a flat image can stretch horribly on a model.
Rotate the dummy in Studio. Look at seams, the edges, how colors meet. If something’s off—fix it. You’re saving future-you a headache.
Mistakes are normal. Fixes are fast if you check before uploading.
Upload your finished design to your profile
So your design looks great in Studio. Time to bring it into your game world.
Here’s how to publish it:
- Head to the “Create” tab on the website.
- Click on “Shirts.”
- Hit the “Choose File” button.
- Select your PNG.
- Name it something unique and memorable.
- Press upload.
Now it enters the approval phase. This usually takes a few minutes but can vary. Don’t close the tab too early. Give it time.
Wear it and flex your design in-game
Once your item is approved, it shows up in your inventory. Click “Wear,” and you’re ready to go.
Jump into any game. Walk through a lobby, race a friend, battle it out. You’re wearing your creation. That matters.
Public option turned on? Now others can wear it too. Set a price or keep it free. You built it—you decide.
What to do if something looks off or doesn’t fit
Glitches happen. Don’t panic. That stretched neckline or off-centered sleeve isn’t the end of the world. It’s just a tweak away.
Common issues:
- Misaligned edges
- Wrong sizing
- PNG saved incorrectly
Fixes:
- Nudge layers in your editor
- Reload in Studio
- Save often, preview often
Most problems take less than 10 minutes to solve.
Master your layer game inside the editor
Layers are your best friend. Without them, you’re drawing blindly. With them, you can test different looks in seconds.
Set up layers for:
- Torso base color
- Front logo or art
- Left and right arms
- Detail effects like stripes or borders
Name every single one. Turn them on and off to compare. Use transparency to check alignment. Lock the background layer so you don’t move it by mistake.
Know the upload limits and approval rules
Before uploading, know the rules. Roblox has strict content filters. Your design must be appropriate and free of copyrighted material.
Avoid:
- Brand logos (unless you own them)
- Offensive text or symbols
- Hidden messages in layers
The system scans your design. Then it goes to a human reviewer. If rejected, you’ll need to change it and try again.
Organize a folder for your design files
Being organized saves your sanity. One folder. Many subfolders. Instant peace.
Structure it like this:
/RobloxDesigns
- /Templates
- /Finished PNGs
- /InProgress
- /RejectedFixes
Now your stuff is easy to find. And you can always go back to previous versions.
Recap: From blank canvas to custom drip
You made something. From scratch. That counts.
- Grabbed a template (Alive Studio made it easy)
- Created your design using layers
- Checked it in Studio
- Uploaded it for approval
- Wore it with pride
Now you’re not just playing. You’re creating.
Final Thoughts
You don’t need to be a pro artist to stand out. You just need to start.
Each try teaches you something. Each mistake makes you better. Every time you log in with your own design, you’re saying: I made this.
Questions? Drop them below. I’ll help.
You’ve got the tools. Go create.